Vendor Management
Create clean vendor records so purchase orders can be issued quickly and consistently.
Before You Start
Section titled “Before You Start”- You are in a tenant with purchasing access.
- You know the supplier’s display name and optional contact details.
-
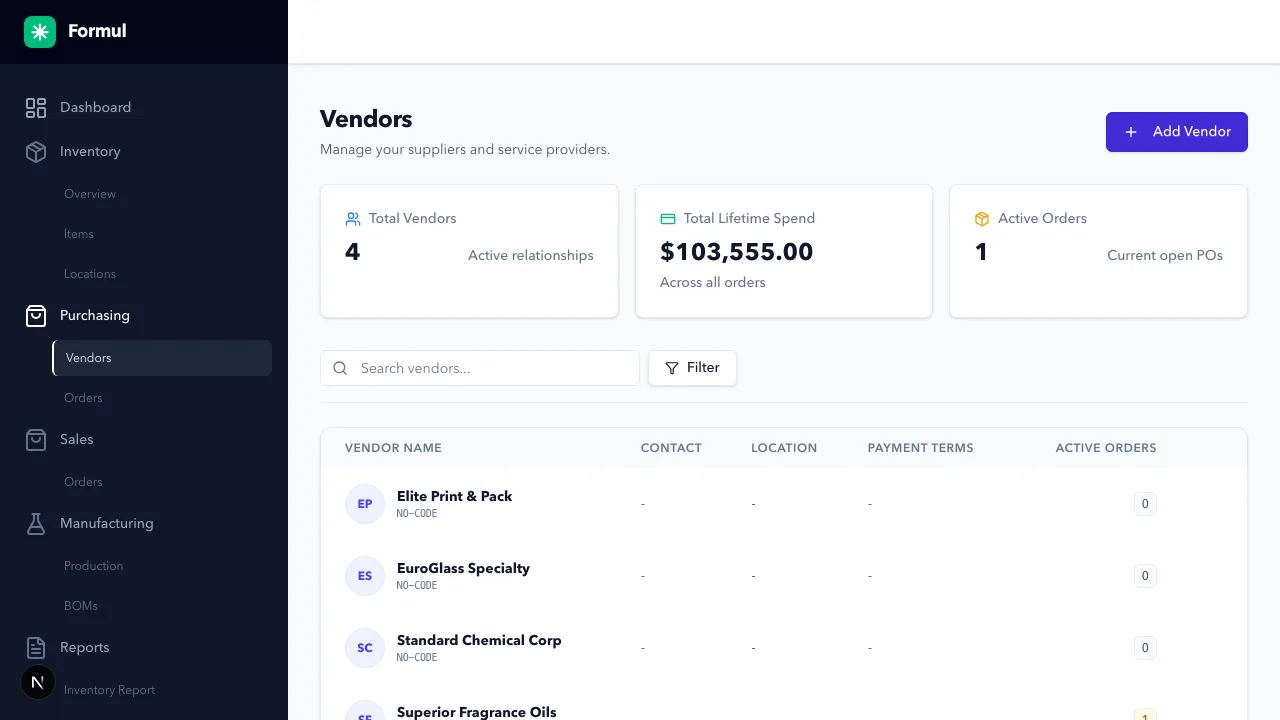
Navigate to Purchasing > Vendors.
-
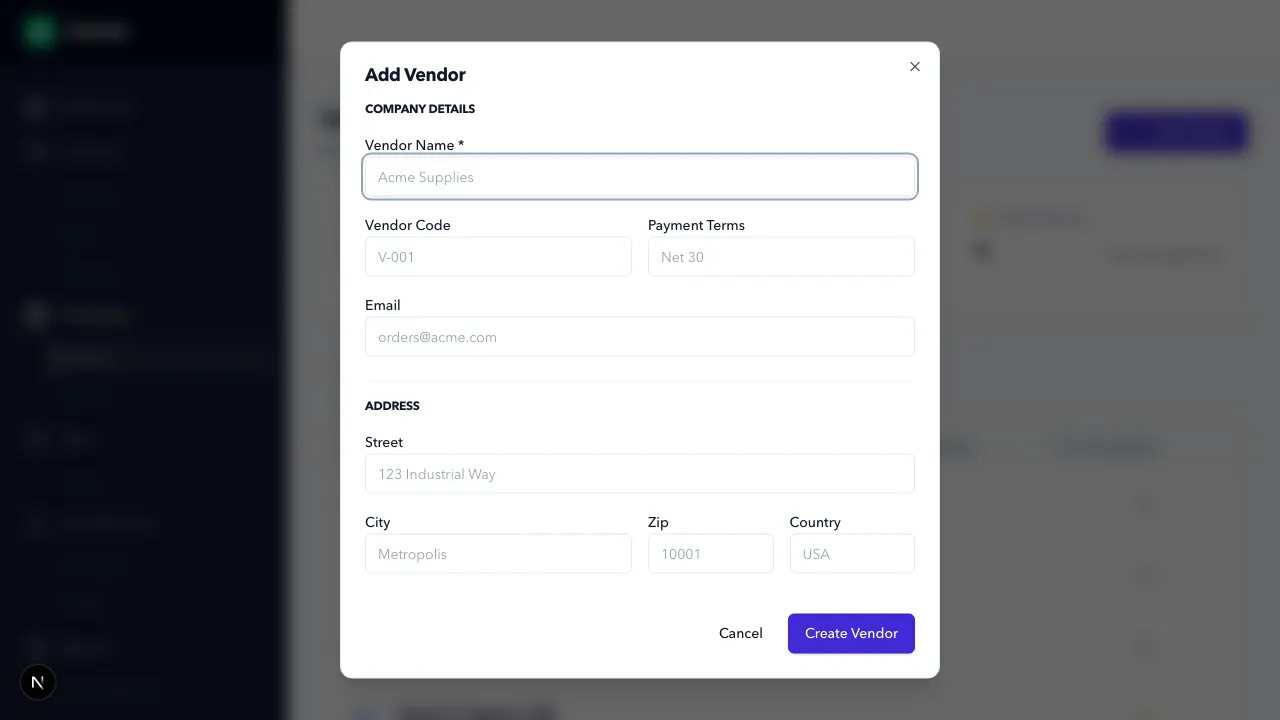
Click Add Vendor.
-
Fill the form:
- Name: Supplier legal or operating name.
- Code (optional): Internal short identifier.
- Payment Terms (optional): For example,
Net 30. - Email (optional): Primary purchasing contact.
-
Click Create Vendor.
-
To update a vendor later, use the row Edit action and save.
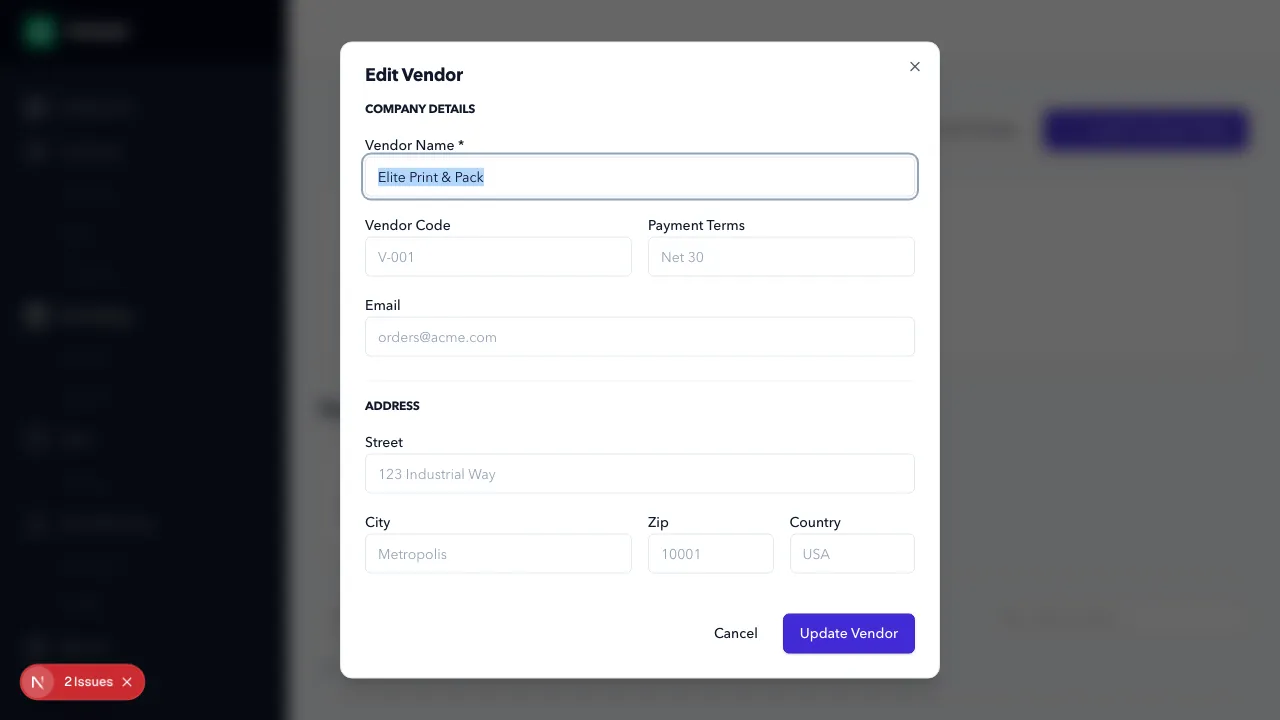
Verification note: this is the Edit Vendor modal and the action button must read Update Vendor (not Create Vendor).
Expected Result in Formul
Section titled “Expected Result in Formul”- Vendor appears in the vendor list.
- Vendor is selectable in purchase order creation.
Why These Fields Matter
Section titled “Why These Fields Matter”- Name is your primary operational identifier: if this is inconsistent, duplicate vendors are created and PO history fragments.
- Before creating a vendor, search first to avoid near-duplicate records (for example,
ABC SupplyvsABC Supplies). - Code helps teams search and sort quickly when vendor names are similar.
- Payment Terms helps buyers understand cash-flow timing when placing orders.
- Email reduces handoff delays by keeping the ordering contact attached to the vendor record.
If Something Looks Wrong
Section titled “If Something Looks Wrong”- Check for duplicate vendor names.
- Confirm required fields are populated.
- Confirm you are in Purchasing > Vendors for the correct tenant.
Next Step
Section titled “Next Step”Create your first order in Purchase Orders.